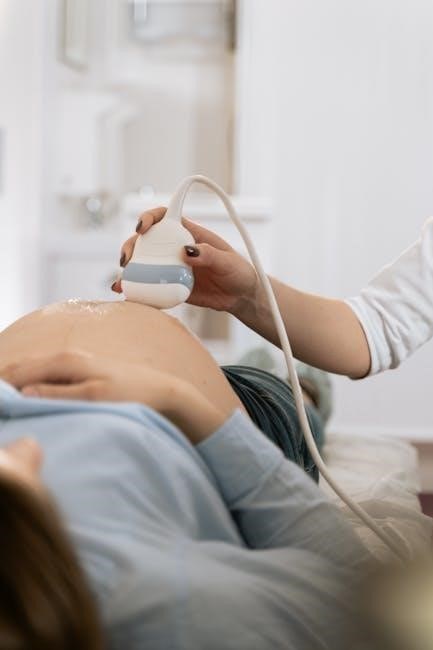
parvo snap test instructions

The Parvo Snap Test is a rapid diagnostic tool for detecting canine parvovirus (CPV) antigen in fecal samples․ It’s quick, accurate, and widely used by veterinarians․

Step-by-Step Instructions for Using the Parvo Snap Test
Gather materials, including gloves, the SNAP test kit, and a fecal sample․ Follow the kit instructions to collect and prepare the sample․ Add it to the provided diluent, mix well, and insert into the test device․ Wait 5-10 minutes for results to appear․
- Collect a fresh fecal sample using the provided collection container․
- Add the sample to the diluent tube, mix thoroughly․
- Insert 3-4 drops into the test device․
- Wait 5-10 minutes for results to appear․
Results will show as either positive, negative, or invalid․ Refer to the kit instructions for interpretation guidance․
Materials Needed for the Test

To perform the Parvo Snap Test, you will need the following materials:
- The SNAP Parvo Test Kit, which includes a test device, sample diluent, and dropper․
- A fresh canine fecal sample, preferably collected within the last 24 hours․
- Gloves to ensure hygienic handling of the sample․
- A clean, disposable container or the collection vial provided in the kit for sample collection․
- A biohazard bag for proper disposal of waste materials․
- Optional: A pipette for precise sample transfer, if not already included․
Ensure all materials are ready before starting the test to streamline the process and avoid contamination․ Always follow the kit instructions for specific requirements․
How to Collect a Fecal Sample
Collecting a fecal sample is a straightforward process that requires attention to hygiene and accuracy:
- Put on disposable gloves to handle the sample safely․
- Use a plastic scoop, spoon, or the provided collection vial to gather a small amount of fresh feces․
- Aim for a sample size similar to a teaspoon to ensure adequate material for testing․
- If the sample is not fresh, it can be stored in a sealed container at 2-8°C for up to one week before testing․
- Avoid contaminating the sample with dirt, grass, or other materials․
- Label the container with the dog’s name and date for easy identification․
- Refrigerate the sample if testing will be delayed, but avoid freezing unless specified․
- Dispose of gloves and cleaning materials properly and wash hands thoroughly․

Ensure the sample is collected hygienically to prevent cross-contamination and ensure accurate test results․
Preparing the Test Kit

Preparing the Parvo Snap Test kit is essential for accurate results․ Begin by bringing the kit to room temperature if it has been refrigerated․ Open the test kit and ensure all components are included: the test device, sample dropper, and buffer solution․ Verify the expiration date on the test device․ Next, carefully remove the test device from its pouch and place it on a clean, flat surface․ Using the sample dropper, add 2-3 drops of the prepared fecal sample to the sample well marked on the test device․ Avoid touching the test strip with the dropper to prevent contamination․ Finally, add 2-3 drops of the provided buffer solution to the same well, ensuring proper reagent flow․ Allow the test to develop according to the instructions, typically 5-10 minutes, before interpreting the results․
Reading and Interpreting Test Results
Reading and interpreting the Parvo Snap Test results is straightforward․ After the test has developed (usually 5-10 minutes), examine the test device for two lines․ A visible control line indicates the test is valid․ If a second line (test line) appears, the result is positive, meaning parvovirus antigen was detected in the sample․ If only the control line is visible, the result is negative, suggesting no antigen was present․ If no lines appear, the test is invalid and should be repeated using a new test kit․ Always refer to the test kit instructions for confirmation․ Consult a veterinarian immediately for positive results to initiate appropriate treatment․ Negative results should still be confirmed with a vet to rule out false negatives or early infection stages․

Factors Affecting the Accuracy of the Parvo Snap Test
Factors affecting the Parvo Snap Test’s accuracy include timing, sample quality, and potential interference from vaccines or other substances, which may impact result reliability and interpretation․
Understanding Vaccine Interference
Vaccine interference can impact the accuracy of the Parvo Snap Test․ Live attenuated parvovirus vaccines may cause false positive results due to shedding of vaccine antigens․ This interference is most significant within 4-5 days post-vaccination but can persist for up to 14 days․ It’s crucial to consider a dog’s vaccination history before testing, as recent vaccination may lead to misleading results․ If a dog has been vaccinated recently and shows clinical signs of parvovirus, additional testing, such as PCR, may be necessary to confirm infection․ Veterinarians should advise dog owners about the potential for vaccine interference and recommend testing only when clinically indicated to avoid unnecessary confusion․
Timing Considerations for Testing
Timing is critical when using the Parvo Snap Test to ensure accurate results․ The test should be conducted on fresh fecal samples, as older samples may degrade and lead to false negatives․ Dogs typically show clinical signs of parvovirus within 3-10 days of exposure, so testing during this window is ideal․ If a dog has been vaccinated recently, it’s important to wait at least 14 days post-vaccination before testing, as live vaccines can shed antigens and cause false positives․ Testing too early or too late can result in inaccurate outcomes․ Always follow the manufacturer’s guidelines and consult a veterinarian for proper interpretation of results․ Proper timing ensures reliable detection of parvovirus and helps guide appropriate treatment decisions․

Troubleshooting Common Issues with the Parvo Snap Test
Common issues include false positives from vaccine interference or improper sample handling․ Ensure fresh fecal samples and follow kit instructions to avoid inaccurate results․ Consult a veterinarian if problems persist․
Identifying and Resolving Common Problems
Common issues with the Parvo Snap Test include false positives due to vaccine interference or improper sample handling․ If a false positive occurs, retest with a fresh sample and ensure it’s collected correctly․ Incorrect test results may also stem from expired kits or failure to follow instructions․ Always verify the expiration date and carefully read the manual․ If no control line appears, the test may be invalid, and a new kit should be used․ Improper storage of the kit, such as exposure to heat or moisture, can also affect accuracy․ For unresolved issues, consult a veterinarian or contact the manufacturer’s support team for assistance․ Proper troubleshooting ensures reliable results and accurate diagnosis․
Interpreting Test Results
Interpreting the Parvo Snap Test results is straightforward․ A positive result is indicated by the appearance of both a control line and a test line, confirming the presence of parvovirus antigen in the sample․ A negative result shows only the control line, meaning no antigen was detected․ If the control line is absent, the test is invalid, and the process should be repeated with a new kit․ False positives may occur due to vaccine interference, while false negatives can result from improper sample collection or timing․ Always follow the manufacturer’s instructions to ensure accuracy․ If unsure, consult a veterinarian for further testing or guidance․ Accurate interpretation is crucial for proper diagnosis and treatment․

Key Takeaways and Best Practices
Always follow the manufacturer’s instructions for accurate results․ Timing and proper sample collection are crucial․ Be aware of vaccine interference․ Handle samples carefully to avoid contamination․
Best Practices for Ensuring Accurate Results
To ensure accurate results, handle fecal samples carefully to avoid contamination․ Collect fresh samples and use them within 24 hours․ Follow the test kit instructions precisely․ Allow the test to develop without interruption․ Store the kit at room temperature as directed․ Interpret results within the recommended timeframe․ Consult a veterinarian for positive results․ Avoid cross-contamination by using gloves․ Check the expiration date of the test kit before use․ Proper timing and sample handling are critical for reliable outcomes․ Always follow the manufacturer’s guidelines for best results․